Monday, May 31, 2010
Sunday, May 30, 2010
Thursday, May 27, 2010
Terror from Space
Tuesday, May 25, 2010
Farm House after Artillery Bombardment


After the smoke has cleared a couple of US Marines have taken up look out positions in a smashed farm house.
This is another scratch built ruined building for 28mm figres. This one is a generic style farm house after being blasted by artillery. Note the shattered tree in front and shell hole on the side.
Monday, May 24, 2010
Imperial German Field Artillery, 1916


 The Krupp Model 1896 77mm field piece was the mainstay of the Imperial German Armies for the first years of the Great War. It was an effective weapon with a maximum range in excess of 9200 meters. While not as good as the famous “French 75,” the 77mm was an important tool for the Imperial Army and did fearful destruction on the frontline formations of the enemies of Germany.
This model and crew are from the Old Glory WWI range of figures.
Labels:
2010,
20th Century,
Artillery,
First World War,
Old Glory,
World War I German
Sunday, May 23, 2010
Grand Army Third Corps Cavalry


 Here we see the Cavalry Corp Commander General Wollwarth and Third Corps Commander Marshal Ney leading the cavalry as they head into Russia in 1812. This unit included the French 11th Hussars, 4th & 8th Chasseurs a Cheval and 6th Chevau-Legers-Lancers. Most of the rest of the corps cavalry was from Wurttemberg-3rd & 4th Mounted Jagers, 1st Chevaulegers and the Lieb-Chevaulegers. In support are two infantry units, the 24th Light Infantry Regiment, the 1st Wurttemberg Jagers and Horse Artillery.
These are 15mm figures, mostly from the old Heritage line that I painted in 1978.
Saturday, May 22, 2010
Constructing a Ruined Building Part Five-End Game


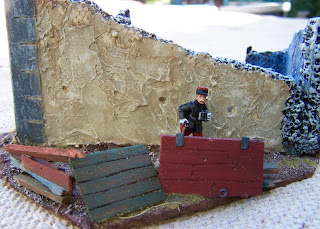
For the final piece a hasty barricade has been added in front of the wall. Final drybrushing, grass, details on rubble and pipes have been completed. Can you find two outside drain pipes, a table & door, two under floor drain pipes and the broken pipes from the wc; how many have water leaking from them? The materials used for this project included styrofoam, white glue, balsawood, plastic straws,wall plaster, and diorama grass. The paint was acrylic and the base was 1/8 inch masonite.
Thursday, May 20, 2010
Constructing a Ruined Building Part Four


 More fine point detailing and drybrushing is now evident. Photos one three and five show the rifle loops that soldiers have dug through the walls. This allowed them to give fire to the enemy while limitinig their own exposure to return fire. Next photos up will be show final detais including more little touches to the house and the final exterior work.
Constructing a Ruined Building Part Three


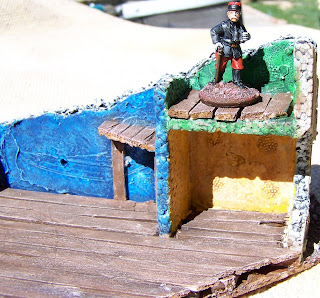
Painting has progressed. The first two shots show that the wood floor has its main coat of brown and first couple of dry brushings. Going for well worn look here. A fire step has been buit by some soldiers in the right corner next to the two small rooms. The third photo shows the inital wall colors dividing the building into the remains of three room, main(blue), WC(yellow),second floor storage(green). Picture four is an exterior shot showing the first of my dry brushing on the wall, Pic five gives a better detail of the fire step and 2nd floor. Next up more dry brushing and detail work.
Tuesday, May 18, 2010
Constructing a Ruined Building Part Two
Monday, May 17, 2010
Constructing a Ruined Building Part One


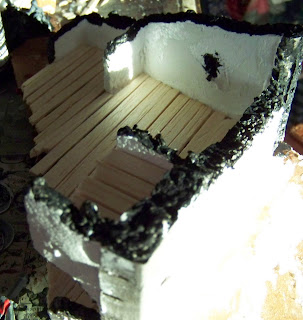
 Here are some step by step photos of a ruined building of the late 19th century design style. Starting with some figure box packing stryofoam, I broke off random chuncks and then formed the two main pieces into a corner design and glued them to a free form style base. The fourth photo shows the subflooring that will support the main wood floor and hide some broken water pipes to be added later. I have just started to glue down the wood floor in the upper section of the photo. In the last picture I have plastered the interior and exterior walls. Also visible are the corrner support stone designs that will be seen on two and a half of the corners. The one half section is on a partially ruined corner where the inner wall material is showing. Tomorow more detailing and the first painting begins.
Subscribe to:
Comments (Atom)


